
Fujifilm’s consumer research, cited across multiple industry reports, consistently finds that fewer than 5% of travel photos taken on smartphones are ever organized into a format that another person could actually view. The average traveler returns home with hundreds of images and, months later, cannot locate most of them without scrolling through an undifferentiated camera roll that also contains utility bills and screenshots of parking meters.
The problem is not a lack of good intentions. It is the absence of a system. This guide covers the practical mechanics: format selection, photo culling, which print services hold up over time, and the specific mistakes that consistently prevent travel scrapbook projects from reaching completion.
Format First: What You Are Actually Choosing Between
Three main formats dominate travel photo preservation: ordered photo books, DIY physical scrapbooks, and instant film albums. They require different time commitments, budgets, and skill sets — and they fail in different places.
| Format | Best For | Estimated Cost | Time Required | Durability |
|---|---|---|---|---|
| Printed Photo Book (Artifact Uprising, Shutterfly) | Trips with 50–200 strong photos; gifts | $15–$180 depending on service and size | 2–6 hours of design and ordering | High — professionally bound, archival paper available |
| DIY Physical Scrapbook | Long trips; sentimental keepsakes; creative projects | $25–$80 in supplies plus $15–$40 in photo printing | 10–20+ hours over multiple sessions | Variable — depends entirely on materials used |
| Instant Film Album (Fujifilm Instax, Polaroid Now) | Spontaneous trip documentation; real-time mementos | $0.75–$1.00 per print plus camera cost | Minimal — prints during the trip | Moderate — fades faster than archival prints |
| Digital Album (Google Photos, iCloud) | Backup and sharing with a group | Free to low monthly cost | 1–3 hours with auto-organization | No physical presence; platform-dependent |
A hybrid approach typically produces better results than committing exclusively to one format. Order a printed photo book through Chatbooks or Artifact Uprising for the finished, shelf-worthy version. Keep a small folder for paper ephemera — ticket stubs, museum entry receipts, a pressed leaf — to supplement it. Digital storage handles everything else as a backup layer.
The all-digital approach results in albums nobody views. The all-physical approach results in projects nobody finishes. The middle path addresses both failure modes at once.
The Culling Problem: Why Most Albums Never Get Started
This is where travel scrapbook projects typically die — not in the design phase, not at the print shop, but at the moment someone opens a camera roll containing 847 photos from Southeast Asia and has no idea where to begin.
Culling, the process of selecting which photos actually make the album, requires a system. Without one, the task remains permanently open-ended.
A Three-Pass Method That Reaches Completion
Pass one: delete obvious failures. Blurry shots, duplicates, accidental captures, mid-blink portraits, photos of signs or menus you no longer need. Be aggressive here. On a standard 300-photo trip, this pass alone typically reduces the set to 80–120 usable images.
Pass two: sort the remaining photos into labeled folders by day or location. “Day 1 – Lisbon Arrival,” “Day 3 – Sintra,” and so on. Use Google Photos’ date-based grouping or Adobe Lightroom’s folder panel for this step. Attempting it in a native phone camera roll is genuinely difficult — these apps are not built for curatorial work.
Pass three: from each location folder, select your top 8–12 images. These are the album photos. Everything else stays in backup storage. A 20-page photo book with 80 carefully chosen images reads considerably better than a 60-page book that includes everything.
What to Collect During the Trip
Paper ephemera adds texture that photographs cannot replicate. Boarding passes, metro tickets, museum admission stubs, a café receipt from a memorable lunch, a foreign postage stamp, a small piece of local packaging — all of these cost nothing to collect and add specificity to a finished album.
Keep a small envelope or ziplock bag in your travel bag specifically for collecting these items during the trip. Attempting to reconstruct them afterward is rarely successful. What feels obvious in the moment becomes impossible to replicate six weeks later.
For written context: brief daily notes, even two or three sentences in Apple Notes or a pocket notebook, anchor photographs to specific memories. Six months after returning, images that seemed completely self-explanatory often require narrative context to identify. Memory is considerably less reliable than most people assume, particularly for sequenced travel experiences where days blur together.
Timing Is the Most Underrated Variable
The culling process works best within two weeks of returning from a trip — ideally within 72 hours while memories are still attached to individual images. After a month, the cognitive work of organizing and identifying photos increases substantially. After three months, most projects stall permanently. Starting early is not a productivity preference. For most people, it is functionally the difference between a finished album and a camera roll that remains unsorted indefinitely.
Photo Book Services Compared for Travel Albums
The photo book market has consolidated since 2026. A handful of services now handle the majority of consumer volume, and the quality differences between them are real and measurable.
| Service | Print Quality | Paper Options | Starting Price (8×8) | Best Use Case |
|---|---|---|---|---|
| Artifact Uprising | Excellent — archival-grade output | Lay-flat, matte, linen cover | ~$65 | Premium keepsake albums; milestone trips; gifts |
| Chatbooks | Good — consistent color reproduction | Standard coated; Instagram import available | ~$15 | Quick, affordable annual trip books; first-time users |
| Shutterfly | Good — dependent on upload quality | Standard glossy and matte | ~$30 (frequent 40–50% discounts) | High photo-count books; buyers who plan around sales |
| CEWE Photo Book | Very good — consistent European standard | Multiple including premium matte | ~$25 (EU pricing) | European travelers; larger format books |
| Mpix | Excellent — professional lab output | Lay-flat, metallic, fine art | ~$45 | Photographers; design-forward users; Canva exports |
For most people making their first or second travel photo book: start with Chatbooks if cost matters, or go directly to Artifact Uprising if you want a book that functions as a genuine keepsake for decades. Shutterfly competes specifically when used during their frequent promotions — the full price is difficult to recommend against these alternatives, but 40–50% off changes the calculation entirely.
Resolution matters. Images under 2 megapixels print with visible degradation at full-page sizes. Most modern smartphones produce images well above that threshold. The exception is screenshots and compressed social media saves — always export original files from your camera app, not copies pulled from Instagram or a messaging app.
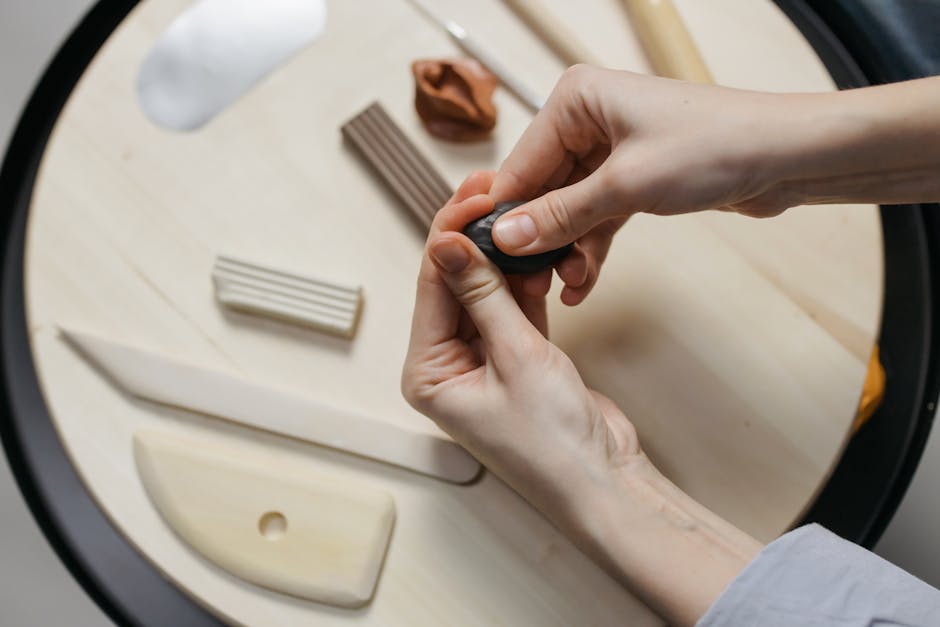
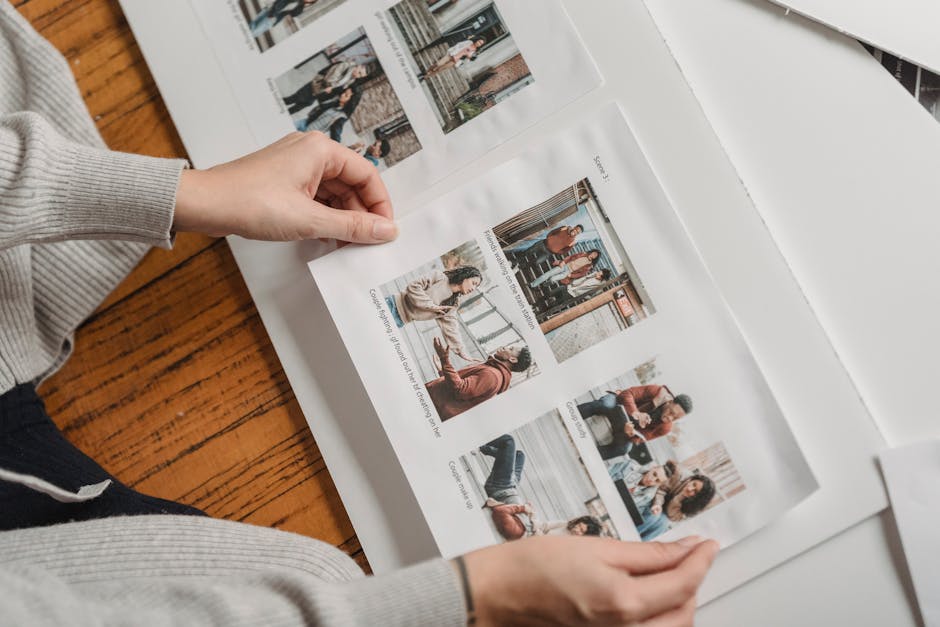
Building a Physical Travel Scrapbook: A Sequential Process
A structured approach leads to finished albums. An unstructured approach leads to a pile of craft supplies that sits in a closet for two years.
- Choose your base album first. Pioneer Photo Albums makes solid 12×12 binders available at most craft stores for $18–$25. The SMASH Folio from K&Company works well for a more casual journal-album hybrid. Decide on format before buying paper or embellishments — dimensions need to match.
- Print photos at a realistic resolution. For home printing, the Canon SELPHY CP1500 (around $100) produces dye-sublimation 4×6 prints that resist water and fading better than standard inkjet output. CVS, Walgreens, and Walmart all offer same-day 4×6 prints for $0.25–$0.35 each — the most practical option for most people.
- Lay out each page before committing to adhesive. Arrange photos, captions, and ephemera dry. Photograph the layout with your phone as a reference. Then apply adhesive. Undoing glue on a finished scrapbook page is, in practice, usually not possible without damaging the print.
- Organize chronologically or by location. Thematic organization — “food,” “sunsets,” “architecture” — sounds appealing in theory and typically reads as disorienting when complete. Chronological or geographic structure follows the natural narrative of the trip.
- Add handwritten captions to at least half the pages. Typed labels work for photo books. For a physical scrapbook, handwritten text adds a layer of specificity that printed labels cannot match. Even two or three sentences per spread — date, location, one specific memory — transforms a photo collection into a document of an actual experience.
- Protect finished pages with archival spray or sleeves. Krylon UV-Resistant Clear Coating ($8–$12 at craft stores), applied lightly over completed pages, extends longevity significantly — particularly for photos printed on standard inkjet paper, which degrades faster than dye-sublimation or professional lab output.
Instant Film Cameras: Where They Fit and Where They Don’t
The Fujifilm Instax Mini 12 ($80) and the Polaroid Now+ ($150) are genuinely useful for travel scrapbooking — with one caveat most reviews underemphasize. Instax Mini film runs $0.75–$1.00 per print. A two-week trip using these cameras regularly will cost $30–$60 in film on top of the camera purchase. Budget for this before buying, not after.
Where instant cameras earn their place: capturing candid moments with people you meet, creating prints that look and feel distinct from smartphone output, and building an album during the trip rather than weeks after returning. Instax Mini prints are credit-card sized — smaller than a standard 4×6 — which limits layout flexibility in 12×12 scrapbooks but works well in compact travel journals and envelope pockets.
Questions People Actually Ask About Travel Photo Albums

How many photos should a travel scrapbook contain?
For a one-week trip, 40–80 printed photos is a reasonable target for a physical scrapbook. Most 8×8 photo books from print services accommodate 20–40 pages comfortably. Beyond that threshold, layouts tend to feel crowded rather than curated, and the album becomes harder to navigate as an object.
What adhesive should you use for photo mounting?
Acid-free adhesives are the standard recommendation for anything intended to last more than a few years. The Scotch Acid-Free Tape Runner ($10) is widely available and reliable for mounting photos to scrapbook pages. Photo corners — small triangular sleeves that hold photo edges without adhesive contact on the print surface — are the better choice for photos you might want to remove or reposition later without damage.
Can you design a travel photo book in Canva and print it through a lab?
Yes, and this combination consistently outperforms the native design tools built into most print services. Canva’s photo book templates offer considerably more layout flexibility. The workflow: design in Canva, export as a print-ready PDF at 300 DPI, upload to Mpix or Artifact Uprising for output. You get design control without sacrificing print quality — and Canva’s interface is easier to use than anything Shutterfly or Chatbooks currently offers natively.
How long does a travel scrapbook realistically take to finish?
A physical scrapbook for a one-week trip typically takes 10–15 hours of actual work across multiple sessions. A designed-and-ordered photo book takes 3–8 hours of design time. Both figures assume photos are already culled and organized before starting — which is why the culling step is not optional.
Six Mistakes That Consistently Kill Travel Scrapbook Projects
- Waiting more than a month to start. Memory context degrades quickly. Photos from three months ago often look unfamiliar without written notes to anchor them. Start the culling step within two weeks of returning, even if you complete nothing else at that point.
- Buying supplies before committing to a format. A cart full of washi tape and decorative paper is worthless if you later decide to order a photo book instead. Pick the format first — then buy what that format requires.
- Printing photos at insufficient resolution. Screenshots and compressed social media saves frequently fall below the 2-megapixel threshold needed for clean 4×6 prints. Export originals from your camera app, not copies pulled from Instagram or a group chat.
- Trying to include everything. A scrapbook with 400 photos from a 10-day trip is an archive, not an album. Culling to your best 80–120 images is not a compromise — it is what makes the finished object readable and worth returning to.
- Skipping captions entirely. Photos without context become opaque surprisingly quickly. Even minimal text — location, date, one specific memory — makes an album legible to anyone who was not present, including yourself five years from now.
- Using non-archival materials. Acidic papers and standard adhesives cause photos to yellow and degrade within a decade. For anything meant to last, look for “acid-free” and “lignin-free” labels on paper, adhesives, and page protectors. The price difference at most craft stores is minimal and the longevity difference is not.